 Source

TubeMap Tutorial
This notebook is a tutorial to run the main processing script that generates annotated graphs from vascualture lightsheet data.
The source for this notebook can be found here:TubeMap.ipynb[ ]:
__author__ = 'Christoph Kirst <christoph.kirst.ck@gmail.com>'
__license__ = 'GPLv3 - GNU General Pulic License v3 (see LICENSE.txt)'
__copyright__ = 'Copyright © 2020 by Christoph Kirst'
__webpage__ = 'http://idisco.info'
__download__ = 'http://www.github.com/ChristophKirst/ClearMap2'
Initialization
Initialize ClearMap
[ ]:
#ClearMap path
import sys
sys.path.append('/home/ckirst/Programs/ClearMap2')
#load ClearMap modules
from ClearMap.Environment import * #analysis:ignore
Note
As ClearMap compiles its code on demand, executing this for the first time may take 5-30min.
Initialize workspace
The following sets up the directories and filenames for a TubeMap project.
The raw files and files generated during the analysis of a data set are managed via the workspace.
[ ]:
#directories and files
directory = '/home/ckirst/Programs/ClearMap2/ClearMap/Tests/Data/TubeMap_Example'
expression_raw = 'Raw/20-54-41_acta2_555-podo_cd31l_647_UltraII[<Y,2> x <X,2>]_C00_UltraII Filter0001.ome.npy'
expression_arteries = 'Raw/20-54-41_acta2_555-podo_cd31l_647_UltraII[<Y,2> x <X,2>]_C00_UltraII Filter0000.ome.npy'
expression_auto = 'Autofluorescence/19-44-05_auto_UltraII_C00_xyz-Table Z<Z,4>.ome.tif'
resources_directory = settings.resources_path
ws = wsp.Workspace('TubeMap', directory=directory);
ws.update(raw=expression_raw, arteries=expression_arteries, autofluorescence=expression_auto)
ws.info()
Workspace[TubeMap]{/home/ckirst/Programs/ClearMap2/ClearMap/Tests/Data/TubeMap_Example}
raw: Raw/20-54-41_acta2_555-podo_cd31l_647_UltraII[<Y,2> x <X,2>]_C00_UltraII Filter0001.ome.tif {2 files, ('Y', 'X'): (1, 4) -> (1, 5)}
autofluorescence: Autofluorescence/19-44-05_auto_UltraII_C00_xyz-Table Z<Z,4>.ome.tif {934 files, ('Z',): (0,) -> (933,)}
stitched: no file
layout: no file
background: no file
resampled: no file
resampled_to_auto: no file
auto_to_reference: no file
arteries: Raw/20-54-41_acta2_555-podo_cd31l_647_UltraII[<Y,2> x <X,2>]_C00_UltraII Filter0000.ome.tif {2 files, ('Y', 'X'): (1, 4) -> (1, 5)}
binary: no file
binary_status: no file
skeleton: no file
graph: no file
density: no file
The output is a list of existing files in the project. As the project is new, only the raw data files and the autofluorescence images exist.
directoryrefers to the folder where the project data are located, and where all results will be written.expression_rawrefers to the source files for the raw vasculature data. It can be just a singe file name if the data is stored in a single file. If the raw data comes as a list of files, this can be an[TagExpression(Api/ClearMap.Utils.TagExpression.html) of the file names.For example, if the files written by the microscope are
UltraII[01 x 01].ome.tif,UltraII[02 x 01].ome.tif, etc, where the[01 x 01]part refres to the rows and columns of the individual stacks we can collect all those files together to a common source using a tag expressionUltraII[<Y,2> x <X,2>].ome.tif.A tag is a place holder for a number or a name and has the general form<Name, Type, Width>(seeTagExpression, and if Type is obmitted the tag is assumed to be digits. Name is the name of the tag and Width the number of chars or digits.Here we use the names ‘X’ and ‘Y’ to denote the axes along the stacks are taken.
Note
The expression extension is
.npyand not.tifas we’ll be working with this format for subsequent steps.expression_arteriesrefers to the arteries channel acquisition. It is handled the same way asexpression_raw.expression_autorefers to the autofluorescence channel acquisition. It is handled the same way asexpression_raw.Here, the generic expression is similar to the one of the mosaic acquisitions, but in this case, each file is a different plane, and not a different tile position. Thus we used
<Z,4>in the expression. By default the z-axis is asusmed to be along the stack direction in this script.Tip
You don’t have to type in the complex filenames yourself! In Linux Ubuntu, you can click on the file whose path you want to get in the file explorer and ‘copy’ (‘ctrl + c’), and then go back on the script and ‘paste’ (
ctrl + v), and the full path of the file will be put in.
Note
All file specificatoins are with respect to the working directory, which is automatically added to all paths. Here, Raw/ or Autofluorescence/ refers to the acquisition folder that was created by the microscope.
You can now access all file infomration through the Workspace. For example to get the file name of the raw data you can run:
[ ]:
ws.filename('raw')
'/home/ckirst/Programs/ClearMap2/ClearMap/Tests/Data/TubeMap_Example/Raw/20-54-41_acta2_555-podo_cd31l_647_UltraII[<Y,2> x <X,2>]_C00_UltraII Filter0001.ome.npy'
To get the file list contributing to the raw data set you can use:
[ ]:
ws.file_list('raw')
['/home/ckirst/Programs/ClearMap2/ClearMap/Tests/Data/TubeMap_Example/Raw/20-54-41_acta2_555-podo_cd31l_647_UltraII[01 x 04]_C00_UltraII Filter0001.ome.npy',
'/home/ckirst/Programs/ClearMap2/ClearMap/Tests/Data/TubeMap_Example/Raw/20-54-41_acta2_555-podo_cd31l_647_UltraII[01 x 05]_C00_UltraII Filter0001.ome.npy']
You can also request access to the data via ClearMap’s IO Source interface:
[ ]:
s = ws.source('raw')
print(s)
print(s.shape)
FileList-Source(404, 1302, 3501, 1, 2)[uint16]<2>{/home/ckirst/Programs/ClearMap2/ClearMap/Tests/Dat...raII[<Y,2> x <X,2>]_C00_UltraII Filter0001.ome.npy}
(404, 1302, 3501, 1, 2)
Initialize alignment
First initialize the atlas reference files by roughly slicing them to the part of the brain under consideration. E.g. here our data set is half a brain and we slice the corresponding hemis-shpere from the refernece atlas.
Note
It is important that the alignment template and annotation file match the field of view of your acquisition. By default, they cover the whole brain, but if you acquired a smaller region of the brain (for instance only one hemisphere), you need to prepare new versions of these files to match the coverage of the brain from your acquisition. Also, the orientation in space of these images in these files needs to match the orientation of the brain during your acquisition. The original file themselves are located in the ‘ClearMap/Ressources/Atlas’ folder and cropped files will be stored there as well.
[ ]:
#init atals and reference files
annotation_file, reference_file, distance_file=ano.prepare_annotation_files(
slicing=(slice(None),slice(None),slice(0,256)), orientation=(1,-2,3),
overwrite=False, verbose=True);
Preparing: '/home/ckirst/Programs/ClearMap2/ClearMap/Resources/Atlas/ABA_25um_annotation__1_-2_3__slice_None_None_None__slice_None_None_None__slice_0_256_None__.tif'
Preparing: '/home/ckirst/Programs/ClearMap2/ClearMap/Resources/Atlas/ABA_25um_reference__1_-2_3__slice_None_None_None__slice_None_None_None__slice_0_256_None__.tif'
Preparing: '/home/ckirst/Programs/ClearMap2/ClearMap/Resources/Atlas/ABA_25um_distance_to_surface__1_-2_3__slice_None_None_None__slice_None_None_None__slice_0_256_None__.tif'
Next we initialize the parameter files to be used for the alignmnet via elastix. We provide a template files in ClearMap that typically dont need to be modified unless you experience problems with the alignment.
[ ]:
#alignment parameter files
align_channels_affine_file = io.join(resources_directory, 'Alignment/align_affine.txt')
align_reference_affine_file = io.join(resources_directory, 'Alignment/align_affine.txt')
align_reference_bspline_file = io.join(resources_directory, 'Alignment/align_bspline.txt')
Tile conversion
ClearMap makes use of accessing binary files in parallel. For optimal performance we recommend to convert the data to numpy files.
This step should take about 3 minutes. At the end, you will have a duplicate of all the original tif files with the npy format. It is recommended to delete the original tif files from the local disk to free up space.
[ ]:
#%% Convet raw data to npy files
io.convert_files(ws.file_list('raw', extension='tif'), extension='npy',
processes=12, verbose=True);
Converting 2 files to npy!
Converting file 0/2 Tif-Source(404, 1302, 3501)[uint16]{/home/ckirst/Programs/ClearMap2/ClearMap/Tests/Dat...47_UltraII[01 x 04]_C00_UltraII Filter0001.ome.tif} -> /home/ckirst/Programs/ClearMap2/ClearMap/Tests/Data/TubeMap_Example/Raw/20-54-41_acta2_555-podo_cd31l_647_UltraII[01 x 04]_C00_UltraII Filter0001.ome.npy
Converting file 1/2 Tif-Source(404, 1302, 3501)[uint16]{/home/ckirst/Programs/ClearMap2/ClearMap/Tests/Dat...47_UltraII[01 x 05]_C00_UltraII Filter0001.ome.tif} -> /home/ckirst/Programs/ClearMap2/ClearMap/Tests/Data/TubeMap_Example/Raw/20-54-41_acta2_555-podo_cd31l_647_UltraII[01 x 05]_C00_UltraII Filter0001.ome.npy
Converting 2 files to npy: elapsed time: 0:00:18.556
[ ]:
#%% Convert artery data to npy files
io.convert_files(ws.file_list('arteries', extension='tif'), extension='npy',
processes=12, verbose=True);
Converting 2 files to npy!
Converting file 0/2 Tif-Source(404, 1302, 3501)[uint16]{/home/ckirst/Programs/ClearMap2/ClearMap/Tests/Dat...47_UltraII[01 x 04]_C00_UltraII Filter0000.ome.tif} -> /home/ckirst/Programs/ClearMap2/ClearMap/Tests/Data/TubeMap_Example/Raw/20-54-41_acta2_555-podo_cd31l_647_UltraII[01 x 04]_C00_UltraII Filter0000.ome.npy
Converting file 1/2 Tif-Source(404, 1302, 3501)[uint16]{/home/ckirst/Programs/ClearMap2/ClearMap/Tests/Dat...47_UltraII[01 x 05]_C00_UltraII Filter0000.ome.tif} -> /home/ckirst/Programs/ClearMap2/ClearMap/Tests/Data/TubeMap_Example/Raw/20-54-41_acta2_555-podo_cd31l_647_UltraII[01 x 05]_C00_UltraII Filter0000.ome.npy
Converting 2 files to npy: elapsed time: 0:00:18.168
Visualization
ClearMap comes with a many tools to visualize the data (Visualization)
To visualize 3d image data ClearMap provides a data explorer:
[ ]:
filename = ws.file_list('raw')[0]
p3d.plot(filename)
[<ClearMap.Visualization.Qt.DataViewer.DataViewer at 0x7fa6f7947690>]
ClearMap’s data viewer opens in a new window alowing you to inspect the data:

You can also open more files at the same time with synchronized windows to inspect them simultaneously. For this, pass a list of files to the plot command:
[ ]:
p3d.plot(ws.file_list('raw')[0:2])
[<ClearMap.Visualization.Qt.DataViewer.DataViewer at 0x7fe254318e10>,
<ClearMap.Visualization.Qt.DataViewer.DataViewer at 0x7fdecbb377d0>]
You can also overlay several files by specfying a inner list of files to overlay in a single window by passing a list in the list of windows to open. So to open one windwo and overlap the files you can pass [[source1, source2]], e.g.:
[ ]:
p3d.plot([ws.file_list('raw')[0:2]])
[<ClearMap.Visualization.Qt.DataViewer.DataViewer at 0x7fa61833cc30>]

Stitching
Stitching is done using ClearMap’s WobblyStitcher.
Rigid z-alignment
First all pairs of tiles are aligned along the z-axis.
The parameters to adjust are:
overlapsis a tuple(x-overlap, y-opverlap)of the expected overlaps along the x- and y-axis d of the stacks in pixels.E.g. if you set a 10% overlap on the microscope and the tile are (400,1300) in shape along x and y, you would use (40,130),
Also, because the microscopes will usually have a delay in their real positions, it is often “safe” to set this overlap a bit larger than the theoretical value. In this example, we set is to (45,155) instead of (40,130), because we noticed the stage had a systematic error of 5 pixels in x and 15 pixels in y. However, this tweak is not necessary.
depthis a tuple(x-depth, y-depth, z-depth)the depth of the projection used at the shared border between two tiles. The correct axis for maximum projection is determined automatically from the tiles.Use a value that is in the order of the overlap and includes enough infomration to enable alignment but not too large so the maximum projection includes too much information only present in one tile.
max_shiftsis a list of tuples of the form[(x-min,x-max),(y-min,y-max),(z-min,z-max)]and sets the range of movement freedom for the tiles from their starting position. The starting position is the one defined previously via overlaps. The larger the value, the more memory is necessary to compute the displacement.On our system, ±30 is a safe value for x and y.
backgroundis a tuple(threshold, number of pixels)that sets the value of the background pixels and the minimum num er of foreground pixels required to align two stacks. Ifnumber of pixelsis afloatit is interpreted as required fraction of pixels in the overlap region to be foreground.You can check the background easily by visualizing a tile as shown above.
[ ]:
layout = stw.WobblyLayout(expression=ws.filename('raw'), tile_axes=['X','Y'], overlaps=(45, 155));
st.align_layout_rigid_mip(layout, depth=[55, 165, None], max_shifts=[(-30,30),(-30,30),(-20,20)],
ranges = [None,None,None], background=(400, 100), clip=25000,
processes=None, verbose=True)
st.place_layout(layout, method='optimization', min_quality=-np.inf, lower_to_origin=True, verbose=True)
st.save_layout(ws.filename('layout', postfix='aligned_axis'), layout)
Alignment: rigidly aligning sources in layout: WobblyLayout<<2s, 1a>>P[0, 0, 0](763, 1302, 3501)[uint16]|F|!
Alignment: aligning (4, 1) with (5, 1), alignment pair 0/1 !
Alignment: aligning (4, 1) with (5, 1), alignment pair 0/1 done, shift = (0, 1, 2), quality = -8.14e+05!
Alignment: rigidly aligning sources in layout: WobblyLayout<<2s, 1a>>P[0, 0, 0](763, 1302, 3501)[uint16]|F|!: elapsed time: 0:00:10.849
Placement: placing WobblyLayout<<2s, 1a>>P[0, 0, 0](763, 1302, 3501)[uint16]|F|!
Placement: placing WobblyLayout<<2s, 1a>>P[0, 0, 0](763, 1303, 3503)[uint16]|F|: elapsed time: 0:00:00.029
'/home/ckirst/Programs/ClearMap2/ClearMap/Tests/Data/TubeMap_Example/layout_aligned_axis_debug.lyt'
Wobbly alignment
The key parameters for the wobbly alignment are:
max_shifts: the movement freedom as before.validate_slice: a dict spcifinh the parameters to determine if the alignment was succesfull.This is the most important parameter. Tiles at the border of the sample are challenging to place, because a lot of planes in these positions are outside the sample. Therefore, empty black planes outside the sample can easily be misplaced, and as a domino effect, this misplacement ripples through all connected tiles. To prevent tiles at the border of the scan to affect others, we set a minimal threshold under which the plane is not aligned, nor placed. Using the visualization tool as indicated above, find the lowest intensity level of a central tile in the brain, usually deep in the scan. Set this minimal intensity value in
valid_range = (200,20000). The other number (20000) is the highest value encountered. If the value is set too high, this could lead to dropped planes inside the brain, which would appear as black tiles in the middle of the mosaic.
[ ]:
#layout = st.load_layout(ws.filename('layout', postfix='aligned_axis'))
stw.align_layout(layout, axis_range=(None, None, 3), max_shifts=[(-30,30),(-15,15),(0,0)], axis_mip=None,
validate=dict(method='foreground', valid_range=(200, None), size=None),
prepare =dict(method='normalization', clip=None, normalize=True),
validate_slice=dict(method='foreground', valid_range=(200,20000), size=1500),
prepare_slice =None,
find_shifts=dict(method='tracing', cutoff=3*np.sqrt(2)),
processes=None, verbose=True)
st.save_layout(ws.filename('layout', postfix='aligned'), layout)
Alignment: aligning 1 pairs of wobbly sources.
Alignment: wobbly alignment (4, 1)->(5, 1) along axis 2
Alignment: Wobbly alignment (4, 1)->(5, 1) along axis 2: slice 0 / 3499
Alignment: Not enough foreground pixels 0 < 1500 in range (200, 20000)!
...
Alignment: Wobbly alignment (4, 1)->(5, 1) along axis 2: slice 3300 / 3499
Alignment: Wobbly alignment (4, 1)->(5, 1) along axis 2: slice 3400 / 3499
Alignment: Wobbly slice alignment (4, 1)->(5, 1) along axis 2 done: elapsed time: 0:03:49.809
Alignment: Wobbly alignment (4, 1)->(5, 1) along axis 2 done: elapsed time: 0:03:50.249
Alignment: aligning 1 pairs of wobbly sources: elapsed time: 0:03:51.146
'/home/ckirst/Programs/ClearMap2/ClearMap/Tests/Data/TubeMap_Example/layout_aligned_debug.lyt'
Wobbly placement
If the alignment parameters are choosed well, this step should run without further parameter settings.
[ ]:
layout = st.load_layout(ws.filename('layout', postfix='aligned'));
stw.place_layout(layout, min_quality = -np.inf,
method = 'optimization',
smooth = dict(method = 'window', window = 'bartlett', window_length = 100, binary = None),
smooth_optimized = dict(method = 'window', window = 'bartlett', window_length = 20, binary = 10),
fix_isolated = False, lower_to_origin = True,
processes = None, verbose = True)
st.save_layout(ws.filename('layout', postfix='placed'), layout)
Placement: placing positions in 3503 slices!
Placement: placing positions in 3503 slices done!: elapsed time: 0:00:01.238
Placement: optimizing wobbly positions!
Placement: found 1 components to optimize!
Placement: optimizing component 0/1 with 3156 clusters!
Placement: done constructing constraints for component 0/1!
Placement: component 0/1 optimized!
Placement: placing wobbly layout done!: elapsed time: 0:00:22.715
'/home/ckirst/Programs/ClearMap2/ClearMap/Tests/Data/TubeMap_Example/layout_placed_debug.lyt'
Wobbly stitching
This step stitches the data together into a large binary file
[ ]:
layout = st.load_layout(ws.filename('layout', postfix='placed'));
stw.stitch_layout(layout, sink = ws.filename('stitched'),
method = 'interpolation', processes='!serial', verbose=True)
Stitching: stitching wobbly layout.
Stitching: stitching 3503 sliced layouts.
Stitching: stitching wobbly slice 0/3503
Stitching: stitching wobbly slice 1/3503
Stitching: stitching wobbly slice 2/3503
...
Stitching: stitching wobbly slice 3500/3503
Stitching: stitching wobbly slice 3502/3503
Stitching: stitching wobbly slice 3501/3503
Stitching: stitching wobbly layout done!: elapsed time: 0:00:47.447
'/home/ckirst/Programs/ClearMap2/ClearMap/Tests/Data/TubeMap_Example/stitched_debug.npy'
[ ]:
p3d.plot(ws.filename('stitched'))
[<ClearMap.Visualization.Qt.DataViewer.DataViewer at 0x7fefdec36410>]
The result will look something like this:

You can use the mouse and click left to pan the view, or you can click right and drag to zoom in and out. Inspect the stitching, move the plane slider to look at other regions. If you see black regions in the mosaic, it is likely that the minimal intensity set in valid_range is too high. If you see misalignment, you can increase the search radius of max_shifts (for both st.align_layout_rigid_mip and stw.align_layout). If the mosaic looks good, you can delete the original
individual tiles from the local disk to free up space.
The same layout is used to stitch the artery channel
[ ]:
layout = st.load_layout(ws.filename('layout', postfix='placed'));
layout.replace_source_location(expression_raw, expression_arteries, method='expression')
stw.stitch_layout(layout, sink = ws.filename('stitched', postfix='arteries'),
method = 'interpolation', processes='!serial', verbose=True)
Stitching: stitching wobbly layout.
Stitching: stitching 3503 sliced layouts.
Stitching: stitching wobbly slice 0/3503
Stitching: stitching wobbly slice 1/3503
Stitching: stitching wobbly slice 2/3503
...
Stitching: stitching wobbly slice 3500/3503
Stitching: stitching wobbly slice 3501/3503
Stitching: stitching wobbly slice 3502/3503
Stitching: stitching wobbly layout done!: elapsed time: 0:00:44.028
'/home/ckirst/Programs/ClearMap2/ClearMap/Tests/Data/TubeMap_Example/stitched_arteries_debug.npy'
[ ]:
p3d.plot([[ws.filename('stitched'), ws.filename('stitched', postfix='arteries')]])
[<ClearMap.Visualization.Qt.DataViewer.DataViewer at 0x7f553c1357d0>]

Resampling and atlas alignment
Here we will align the scan with the reference atlas. As mentioned before, make sure the template and annotation files are in the same orientation as the brain scan, and that their field of view covers more or less the same regions.
Resampling - raw data
In the resampling and alignment step, there are only a few parameters to check:
source_resolutionis the resolution of the data as(x-resolution, y-resolution, z-resolution).sink-resolutionis the resolution of the Atlas. We use the 25µm version of the annotation.
[ ]:
resample_parameter = {
"source_resolution" : (1.625,1.625,1.6),
"sink_resolution" : (25,25,25),
"processes" : None,
"verbose" : True,
};
res.resample(ws.filename('stitched'), sink=ws.filename('resampled'), **resample_parameter)
Process 0: Resampling: resampling axes (0, 1), slice (0,) / 3503
Process 1: Resampling: resampling axes (0, 1), slice (1,) / 3503
Process 2: Resampling: resampling axes (0, 1), slice (2,) / 3503
...
Process 45: Resampling: resampling axes (1, 2), slice (45,) / 50
Process 48: Resampling: resampling axes (1, 2), slice (48,) / 50
Process 49: Resampling: resampling axes (1, 2), slice (49,) / 50
Resampling: elapsed time: 0:00:09.397
Tif-Source(50, 85, 225)[uint16]{/home/ckirst/Programs/ClearMap2/ClearMap/Tests/Data/TubeMap_Example/resampled_debug.tif}
Resampling - autofluorescence
source_resolutionrefers to the autofluorescence scan.
[ ]:
resample_parameter_auto = {
"source_resolution" : (5,5,6),
"sink_resolution" : (25,25,25),
"processes" : None,
"verbose" : True,
};
res.resample(ws.filename('autofluorescence'),
sink=ws.filename('resampled', postfix='autofluorescence'),
**resample_parameter_auto)
#p3d.plot([ws.filename('resampled'), ws.filename('resampled', postfix='autofluorescence')])
Alignment - resampled to autofluorescence
This step interfaces to elastix to aligin the resampled raw image to the resampled autofluorescence image.
As the autofluorescence image is often taken in a separate step with different microscope settings both images typically do not align. This steps corrects for this via a affine transformation.
[ ]:
# align the two channels
align_channels_parameter = {
#moving and reference images
"moving_image" : ws.filename('resampled', postfix='autofluorescence'),
"fixed_image" : ws.filename('resampled'),
#elastix parameter files for alignment
"affine_parameter_file" : align_channels_affine_file,
"bspline_parameter_file" : None,
#directory of the alig'/home/nicolas.renier/Documents/ClearMap_Ressources/Par0000affine.txt',nment result
"result_directory" : ws.filename('elastix_resampled_to_auto')
};
elx.align(**align_channels_parameter);
Alignment - autofluorescence to reference
This step aligins the resampled autofluorescence image to the atlas reference via a non-linear transformation.
[ ]:
# align autofluorescence to reference
align_reference_parameter = {
#moving and reference images
"moving_image" : reference_file,
"fixed_image" : ws.filename('resampled', postfix='autofluorescence'),
#elastix parameter files for alignment
"affine_parameter_file" : align_reference_affine_file,
"bspline_parameter_file" : align_reference_bspline_file,
#directory of the alignment result
"result_directory" : ws.filename('elastix_auto_to_reference')
};
elx.align(**align_reference_parameter);
The alignment step should last for about 2 to 10 minutes and generate two files: ws.filename('resampled') and ws.filename('resampled', postfix='autofluorescence')), as well as 2 folders: elastix_resampled_to_auto and elastix_auto_to_reference.
You can check the quality of the alignment. The easiest is to use Fiji (Image J). Open the following files: ws.filename('resampled') and ws.filename('resampled', postfix='autofluorescence')). These are the original we need to align.
Then go into the elastix_resampled_to_auto folder. This is the alignment of the resampled data to the resampled autofluorescence image. Open the result.0.mhd file.
Then go to the folder elastix_auto_to_reference. This is the result of the alignment of the autofluorescence to the Atlas reference. Open the result.1.mhd file.
Organize the files as follows:

You can find the contrast adjustment panel in Image -> Adjust -> Brightness/Contrast. The synchronize windows tool can be found in Analyze -> Tools -> Synchronize windows. Click on Synchronize all, and travel through the stacks. With the mouse pointer, and make sure each aligned stack are well in sync with each other: make sure the outline of the brain is aligned, as well as the internal structures. Only the aligned data (images organized vertically here) have to match. If the
alignment is good, you are then ready for the image processing steps.
Create test data
This optional step allows to create a smaller sub-image from the full image in order to test the image processing pipeline that follows.
When starting with a new data set, we highly recommend using this step to speed up processing and adjust the pipeline.
Skip this if you dont need to test the pipeline.
[ ]:
#%% Crop test data
#select debug mode / test file name
ws.debug = True;
#ws.debug = 'test'
#select sublice for testing the pipeline
slicing = (slice(0,400),slice(0,600),slice(1000,1300));
[ws.create_debug('stitched', slicing=slicing),
ws.create_debug('stitched', postfix='arteries', slicing=slicing)]
#p3d.plot(ws.filename('stitched'))
['/home/ckirst/Programs/ClearMap2/ClearMap/Tests/Data/TubeMap_Example/debug_stitched.npy',
'/home/ckirst/Programs/ClearMap2/ClearMap/Tests/Data/TubeMap_Example/debug_stitched_arteries.npy']
If you like to create various test sets you can give each subset a name by setting ws.debug = 'name_for_the_test_subset' in the above code and run it again.
You can switch between test sets by using ws.debug = 'name_for_the_test_subset'
Once the pipeline is performing well, you can swtich to run it on the full data by setting ws.debug = False
You can see the effect of the debug mode on the filenames here:
[ ]:
debug = ws.debug;
ws.debug = False
print(ws.filename('stitched', directory=False))
ws.debug = True
print(ws.filename('stitched', directory=False))
ws.debug = 'test'
print(ws.filename('stitched', directory=False))
ws.debug = debug;
stitched.npy
debug_stitched.npy
test_stitched.npy
Image processing
The goal of the image processing step is to turn the 16bit intensity levels image of vessels and arteries into a “binary” image, in which each pixel either belongs to a vessel or not. This step is essential to get a good quality reconstruction. The center line of the vessels will be evaluated from this binary image, and it necessitates the vessels to appear as filled tubes. Therefore, the image processing has two steps: In the first step, we create the first binary mask from the vessels and arteries images. Then in the second step we clean this binary image by removing holes in the vessels and noise in the background.
Binarization - Vasculature
The two important parameters to set here are:
processing_parameter['processes']which defines how many processors work at the same time.The more processors work, the faster the process will be, but the more system (RAM) memory you need. You can start with 10 and check if you get a memory error. If you do, you can decrease the number of processors. If it works fine, you can test with more processors.
binarization_parameter['clip']['clip_range']as tuple (min, max) sets the range for the vessel detection.To help you find this range, open the main scan mosaic with the command
ws.plot(‘stitched’). Look for the weakest intensities in the pixels inside the brain (ignore the pixels outside the brain). Set the minimum based on the lowest intensities you see. For the higher intensity, look at the large vessels at the surface. You should set to the limit to a value that still excludes the halo.
All parameters forthe image processing are described in the methods
Tip
The lowest signal intensity in the whole brain is often found, counterintuitively, in the hippocampus of in the deep cerebellar nuclei.
[ ]:
source = ws.filename('stitched');
sink = ws.filename('binary');
io.delete_file(sink)
binarization_parameter = vasc.default_binarization_parameter.copy();
binarization_parameter['clip']['clip_range'] = (200, 7000)
processing_parameter = vasc.default_binarization_processing_parameter.copy();
processing_parameter.update(processes = None,
as_memory = True,
verbose = True);
vasc.binarize(source, sink,
binarization_parameter=binarization_parameter,
processing_parameter=processing_parameter);
Processing 8 blocks with function 'binarize_block'.
Processing block 3/8<(0, 0, 3)/(1, 1, 8)> (400, 600, 38)@(400, 600, 300)[(:,:,112:150)]
Processing block 2/8<(0, 0, 2)/(1, 1, 8)> (400, 600, 37)@(400, 600, 300)[(:,:,75:112)]
...
Block (0, 0, 7)> (400, 600, 38)@(400, 600, 38)[(:,:,:)]: Vesselization: elapsed time: 0:00:19.642
Block (0, 0, 7)> (400, 600, 38)@(400, 600, 38)[(:,:,:)]: Vesselization: binarization: elapsed time: 0:00:19.655
Block (0, 0, 7)> (400, 600, 38)@(400, 600, 38)[(:,:,:)]: Binarization: elapsed time: 0:01:00.961
Processing block 7/8<(0, 0, 7)/(1, 1, 8)> (400, 600, 38)@(400, 600, 300)[(:,:,262:300)]: elapsed time: 0:01:01.139
Processed 8 blocks with function 'binarize_block': elapsed time: 0:01:01.792
The binarization should take around 4-5h for the full data set.
You can inspect and overlay the result using the following cell.
[ ]:
p3d.plot([source, sink])
[<ClearMap.Visualization.Qt.DataViewer.DataViewer at 0x7f52e87bed70>,
<ClearMap.Visualization.Qt.DataViewer.DataViewer at 0x7f52e4cacb90>]
The result will look somthing like

In a final step the binarized result is postprocessed by filling small holes and smoothing the surface.
[ ]:
source = ws.filename('binary');
sink = ws.filename('binary', postfix='postprocessed');
postprocessing_parameter = vasc.default_postprocessing_parameter.copy();
#postprocessing_parameter['fill'] = None;
postprocessing_processing_parameter = vasc.default_postprocessing_processing_parameter.copy();
postprocessing_processing_parameter.update(size_max=100);
vasc.postprocess(source, sink,
postprocessing_parameter=postprocessing_parameter,
processing_parameter=postprocessing_processing_parameter,
processes=None, verbose=True)
#p3d.plot([[source, sink]])
Binary post processing: initialized.
Binary smoothing: initialized!
Processing 8 blocks with function 'smooth_by_configuration'.
Processing block 5/8<(0, 0, 5)/(1, 1, 8)> (400, 600, 50)@(400, 600, 300)[(:,:,178:228)]
Processing block 3/8<(0, 0, 3)/(1, 1, 8)> (400, 600, 50)@(400, 600, 300)[(:,:,107:157)]
Processing block 1/8<(0, 0, 1)/(1, 1, 8)> (400, 600, 50)@(400, 600, 300)[(:,:,35:85)]
Processing block 2/8<(0, 0, 2)/(1, 1, 8)> (400, 600, 50)@(400, 600, 300)[(:,:,71:121)]
Processing block 4/8<(0, 0, 4)/(1, 1, 8)> (400, 600, 49)@(400, 600, 300)[(:,:,143:192)]
Processing block 0/8<(0, 0, 0)/(1, 1, 8)> (400, 600, 49)@(400, 600, 300)[(:,:,0:49)]
Processing block 6/8<(0, 0, 6)/(1, 1, 8)> (400, 600, 50)@(400, 600, 300)[(:,:,214:264)]
Processing block 7/8<(0, 0, 7)/(1, 1, 8)> (400, 600, 50)@(400, 600, 300)[(:,:,250:300)]
Processing block 4/8<(0, 0, 4)/(1, 1, 8)> (400, 600, 49)@(400, 600, 300)[(:,:,143:192)]: elapsed time: 0:00:12.093
Processing block 1/8<(0, 0, 1)/(1, 1, 8)> (400, 600, 50)@(400, 600, 300)[(:,:,35:85)]: elapsed time: 0:00:12.232
Processing block 6/8<(0, 0, 6)/(1, 1, 8)> (400, 600, 50)@(400, 600, 300)[(:,:,214:264)]: elapsed time: 0:00:12.323
Processing block 3/8<(0, 0, 3)/(1, 1, 8)> (400, 600, 50)@(400, 600, 300)[(:,:,107:157)]: elapsed time: 0:00:12.819
Processing block 7/8<(0, 0, 7)/(1, 1, 8)> (400, 600, 50)@(400, 600, 300)[(:,:,250:300)]: elapsed time: 0:00:13.250
Processing block 2/8<(0, 0, 2)/(1, 1, 8)> (400, 600, 50)@(400, 600, 300)[(:,:,71:121)]: elapsed time: 0:00:13.309
Processing block 0/8<(0, 0, 0)/(1, 1, 8)> (400, 600, 49)@(400, 600, 300)[(:,:,0:49)]: elapsed time: 0:00:13.331
Processing block 5/8<(0, 0, 5)/(1, 1, 8)> (400, 600, 50)@(400, 600, 300)[(:,:,178:228)]: elapsed time: 0:00:13.933
Processed 8 blocks with function 'smooth_by_configuration': elapsed time: 0:00:14.421
Binary smoothing: done: elapsed time: 0:00:14.422
Binary filling: initialized!
Binary filling: elapsed time: 0:00:01.564
Binary post processing: elapsed time: 0:00:16.139
Arterial Binarization
The binarizatio for the arterial data set is very similar to the vasculature binarization:
[ ]:
source = ws.filename('stitched', postfix='arteries');
sink = ws.filename('binary', postfix='arteries');
io.delete_file(sink)
binarization_parameter = vasc.default_binarization_parameter.copy();
binarization_parameter['clip']['clip_range'] = (1000, 8000)
binarization_parameter['deconvolve']['threshold'] = 450
binarization_parameter['equalize'] = None;
binarization_parameter['vesselize'] = None;
processing_parameter = vasc.default_binarization_processing_parameter.copy();
processing_parameter.update(processes = 20,
as_memory = True, verbose=True);
vasc.binarize(source, sink,
binarization_parameter=binarization_parameter,
processing_parameter=processing_parameter);
#p3d.plot([source, sink])
Processing 8 blocks with function 'binarize_block'.
Processing block 2/8<(0, 0, 2)/(1, 1, 8)> (400, 600, 37)@(400, 600, 300)[(:,:,75:112)]
...
Processing block 7/8<(0, 0, 7)/(1, 1, 8)> (400, 600, 38)@(400, 600, 300)[(:,:,262:300)]: elapsed time: 0:00:29.976
Processing block 3/8<(0, 0, 3)/(1, 1, 8)> (400, 600, 38)@(400, 600, 300)[(:,:,112:150)]: elapsed time: 0:00:29.988
Processing block 2/8<(0, 0, 2)/(1, 1, 8)> (400, 600, 37)@(400, 600, 300)[(:,:,75:112)]: elapsed time: 0:00:29.991
Processing block 0/8<(0, 0, 0)/(1, 1, 8)> (400, 600, 37)@(400, 600, 300)[(:,:,0:37)]: elapsed time: 0:00:29.986
Processed 8 blocks with function 'binarize_block': elapsed time: 0:00:30.608
[ ]:
source = ws.filename('binary', postfix='arteries');
sink = ws.filename('binary', postfix='arteries_postprocessed');
sink_smooth = ws.filename('binary', postfix='arteries_smoothed');
postprocessing_parameter = vasc.default_postprocessing_parameter.copy();
postprocessing_processing_parameter = vasc.default_postprocessing_processing_parameter.copy();
postprocessing_processing_parameter.update(size_max = 50);
vasc.postprocess(source, sink, postprocessing_parameter=postprocessing_parameter,
processing_parameter=postprocessing_processing_parameter,
processes=None, verbose=True)
#p3d.plot([source, sink])
Binary post processing: initialized.
Binary smoothing: initialized!
Processing 8 blocks with function 'smooth_by_configuration'.
Processing block 3/8<(0, 0, 3)/(1, 1, 8)> (400, 600, 50)@(400, 600, 300)[(:,:,107:157)]
Processing block 0/8<(0, 0, 0)/(1, 1, 8)> (400, 600, 49)@(400, 600, 300)[(:,:,0:49)]
Processing block 5/8<(0, 0, 5)/(1, 1, 8)> (400, 600, 50)@(400, 600, 300)[(:,:,178:228)]
Processing block 4/8<(0, 0, 4)/(1, 1, 8)> (400, 600, 49)@(400, 600, 300)[(:,:,143:192)]
Processing block 6/8<(0, 0, 6)/(1, 1, 8)> (400, 600, 50)@(400, 600, 300)[(:,:,214:264)]
Processing block 2/8<(0, 0, 2)/(1, 1, 8)> (400, 600, 50)@(400, 600, 300)[(:,:,71:121)]
Processing block 7/8<(0, 0, 7)/(1, 1, 8)> (400, 600, 50)@(400, 600, 300)[(:,:,250:300)]
Processing block 1/8<(0, 0, 1)/(1, 1, 8)> (400, 600, 50)@(400, 600, 300)[(:,:,35:85)]
Processing block 2/8<(0, 0, 2)/(1, 1, 8)> (400, 600, 50)@(400, 600, 300)[(:,:,71:121)]: elapsed time: 0:00:07.873
Processing block 7/8<(0, 0, 7)/(1, 1, 8)> (400, 600, 50)@(400, 600, 300)[(:,:,250:300)]: elapsed time: 0:00:08.217
Processing block 5/8<(0, 0, 5)/(1, 1, 8)> (400, 600, 50)@(400, 600, 300)[(:,:,178:228)]: elapsed time: 0:00:08.257
Processing block 6/8<(0, 0, 6)/(1, 1, 8)> (400, 600, 50)@(400, 600, 300)[(:,:,214:264)]: elapsed time: 0:00:08.270
Processing block 1/8<(0, 0, 1)/(1, 1, 8)> (400, 600, 50)@(400, 600, 300)[(:,:,35:85)]: elapsed time: 0:00:08.279
Processing block 3/8<(0, 0, 3)/(1, 1, 8)> (400, 600, 50)@(400, 600, 300)[(:,:,107:157)]: elapsed time: 0:00:08.473
Processing block 0/8<(0, 0, 0)/(1, 1, 8)> (400, 600, 49)@(400, 600, 300)[(:,:,0:49)]: elapsed time: 0:00:08.483
Processing block 4/8<(0, 0, 4)/(1, 1, 8)> (400, 600, 49)@(400, 600, 300)[(:,:,143:192)]: elapsed time: 0:00:08.590
Processed 8 blocks with function 'smooth_by_configuration': elapsed time: 0:00:08.951
Binary smoothing: done: elapsed time: 0:00:08.952
Binary filling: initialized!
Binary filling: elapsed time: 0:00:01.743
Binary post processing: elapsed time: 0:00:10.805
[ ]:
p3d.plot([[ws.filename('stitched', postfix='arteries'),
ws.filename('binary', postfix='arteries_postprocessed')]])
[<ClearMap.Visualization.Qt.DataViewer.DataViewer at 0x7f553d6d17d0>]
Vessel filling
In this step a trained convolutional deep network is applied to fill the holes of hollow vessels in the vasculature and artieres data.
Typically, no parameters neeed to be changed.
Note
The arteries are filled separately so the reuslt can be used to label arterial vessles later on.
[ ]:
source = ws.filename('binary', postfix='postprocessed');
sink = ws.filename('binary', postfix='filled');
io.delete_file(sink)
processing_parameter = vf.default_fill_vessels_processing_parameter.copy();
processing_parameter.update(size_max = 200,
size_min = 'fixed',
axes = all,
overlap = 50);
vf.fill_vessels(source, sink,
resample=1, threshold=0.5, cuda=None,
processing_parameter=processing_parameter, verbose=True)
#p3d.plot([source, sink]);
Vessel filling: neural network initialized: elapsed time: 0:00:00.004
VesselFillingNetwork(
(conv1): Conv3d(1, 16, kernel_size=(7, 7, 7), stride=(2, 2, 2), padding=(3, 3, 3))
(conv2): Conv3d(16, 32, kernel_size=(5, 5, 5), stride=(1, 1, 1), padding=(2, 2, 2))
(desepconv4): DeSepConv3d(
(depthwise): Conv3d(32, 32, kernel_size=(3, 3, 3), stride=(1, 1, 1), padding=(1, 1, 1), groups=32)
(pointwise): Conv3d(32, 32, kernel_size=(1, 1, 1), stride=(1, 1, 1))
)
(convbin1): Conv3d(32, 32, kernel_size=(3, 3, 3), stride=(1, 1, 1), padding=(1, 1, 1))
(conv3): ConvTranspose3d(32, 16, kernel_size=(7, 7, 7), stride=(2, 2, 2), padding=(3, 3, 3))
(conv4): Conv3d(17, 2, kernel_size=(3, 3, 3), stride=(1, 1, 1), padding=(1, 1, 1))
(maxpool): MaxPool3d(kernel_size=2, stride=2, padding=0, dilation=1, ceil_mode=False)
(relu): ReLU(inplace=True)
(dropout): Dropout(p=0.15, inplace=False)
(softmax): Softmax(dim=1)
(out_act): Sigmoid()
(upsample): Upsample(scale_factor=2.0, mode=trilinear)
)
Vessel filling: using cpu
Vessel filling: source loaded: elapsed time: 0:00:00.011
Vessel filling: processing block 0/24<(0, 0, 0)/(3, 4, 2)> (200, 200, 200)@(400, 600, 300)[(0:200,0:200,0:200)]
Vessel filling: loaded data: (1, 200, 200, 200)
Vessel filling: resampled data: (1, 1, 200, 200, 200)
Vessel filling: network (1, 1, 198, 198, 198)
Vessel filling: upsampled (1, 1, 198, 198, 198)
Vessel filling: thresholded (1, 1, 198, 198, 198)
Vessel filling: result written to (slice(None, 198, None), slice(None, 198, None), slice(None, 198, None))
Vessel filling: processing block 0/24<(0, 0, 0)/(3, 4, 2)> (200, 200, 200)@(400, 600, 300)[(0:200,0:200,0:200)]: elapsed time: 0:00:49.336
...
Vessel filling: elapsed time: 0:11:40.348
Memmap-Source(400, 600, 300)[bool]|F|{/home/ckirst/Programs/ClearMap2/ClearMap/Tests/Data/TubeMap_Example/debug_binary_filled.npy}
[ ]:
source = ws.filename('binary', postfix='arteries_postprocessed');
sink = ws.filename('binary', postfix='arteries_filled');
io.delete_file(sink)
processing_parameter = vf.default_fill_vessels_processing_parameter.copy();
processing_parameter.update(size_max = 1000,
size_min = 'fixed',
axes = all,
overlap = 100);
vf.fill_vessels(source, sink,
resample=2, threshold=0.5, cuda=None,
processing_parameter=processing_parameter, verbose=True)
#p2d.plot([source, sink]);
Vessel filling: neural network initialized: elapsed time: 0:00:00.003
VesselFillingNetwork(
(conv1): Conv3d(1, 16, kernel_size=(7, 7, 7), stride=(2, 2, 2), padding=(3, 3, 3))
(conv2): Conv3d(16, 32, kernel_size=(5, 5, 5), stride=(1, 1, 1), padding=(2, 2, 2))
(desepconv4): DeSepConv3d(
(depthwise): Conv3d(32, 32, kernel_size=(3, 3, 3), stride=(1, 1, 1), padding=(1, 1, 1), groups=32)
(pointwise): Conv3d(32, 32, kernel_size=(1, 1, 1), stride=(1, 1, 1))
)
(convbin1): Conv3d(32, 32, kernel_size=(3, 3, 3), stride=(1, 1, 1), padding=(1, 1, 1))
(conv3): ConvTranspose3d(32, 16, kernel_size=(7, 7, 7), stride=(2, 2, 2), padding=(3, 3, 3))
(conv4): Conv3d(17, 2, kernel_size=(3, 3, 3), stride=(1, 1, 1), padding=(1, 1, 1))
(maxpool): MaxPool3d(kernel_size=2, stride=2, padding=0, dilation=1, ceil_mode=False)
(relu): ReLU(inplace=True)
(dropout): Dropout(p=0.15, inplace=False)
(softmax): Softmax(dim=1)
(out_act): Sigmoid()
(upsample): Upsample(scale_factor=2.0, mode=trilinear)
)
Vessel filling: using cpu
Vessel filling: source loaded: elapsed time: 0:00:00.004
Vessel filling: processing block 0/1<(0, 0, 0)/(1, 1, 1)> (400, 600, 300)@(400, 600, 300)[(0:400,0:600,0:300)]
Vessel filling: loaded data: (1, 400, 600, 300)
Vessel filling: resampled data: (1, 1, 200, 300, 150)
Vessel filling: network (1, 1, 198, 294, 150)
Vessel filling: upsampled (1, 1, 396, 588, 300)
Vessel filling: thresholded (396, 588, 300)
Vessel filling: result written to (slice(None, 396, None), slice(None, 588, None), slice(None, None, None))
Vessel filling: processing block 0/1<(0, 0, 0)/(1, 1, 1)> (400, 600, 300)@(400, 600, 300)[(0:400,0:600,0:300)]: elapsed time: 0:00:37.691
Vessel filling: elapsed time: 0:00:37.696
Memmap-Source(400, 600, 300)[bool]|F|{/home/ckirst/Programs/ClearMap2/ClearMap/Tests/Data/TubeMap_Example/debug_binary_arteries_filled.npy}
Finally, both images are combined into a single binary.
[25]:
source = ws.filename('binary', postfix='filled');
source_arteries = ws.filename('binary', postfix='arteries_filled');
sink = ws.filename('binary', postfix='combined');
io.delete_file(sink)
bp.process(np.logical_or, [source, source_arteries], sink,
size_max=500, overlap=0, processes=None, verbose=True)
#p3d.plot([[source, source_arteries, sink]])
Processing 1 blocks with function 'logical_or'.
Processing block 0/1<(0, 0, 0)/(1, 1, 1)> (400, 600, 300)@(400, 600, 300)[(:,:,0:300)]
Processing block 0/1<(0, 0, 0)/(1, 1, 1)> (400, 600, 300)@(400, 600, 300)[(:,:,0:300)]: elapsed time: 0:00:00.935
Processed 1 blocks with function 'logical_or': elapsed time: 0:00:01.216
[25]:
'/home/ckirst/Programs/ClearMap2/ClearMap/Tests/Data/TubeMap_Example/debug_binary_combined.npy'
And a standard binary smoothing and filling is used to fill any remaining holes
[26]:
source = ws.filename('binary', postfix='combined');
sink = ws.filename('binary', postfix='final');
postprocessing_parameter = vasc.default_postprocessing_parameter.copy();
postprocessing_processing_parameter = vasc.default_postprocessing_processing_parameter.copy();
postprocessing_processing_parameter['size_max'] = 50;
vasc.postprocess(source, sink, postprocessing_parameter=postprocessing_parameter,
processing_parameter=postprocessing_processing_parameter,
processes=None, verbose=True)
Binary post processing: initialized.
Binary smoothing: initialized!
Processing 8 blocks with function 'smooth_by_configuration'.
Processing block 0/8<(0, 0, 0)/(1, 1, 8)> (400, 600, 49)@(400, 600, 300)[(:,:,0:49)]
Processing block 4/8<(0, 0, 4)/(1, 1, 8)> (400, 600, 49)@(400, 600, 300)[(:,:,143:192)]
Processing block 1/8<(0, 0, 1)/(1, 1, 8)> (400, 600, 50)@(400, 600, 300)[(:,:,35:85)]
Processing block 5/8<(0, 0, 5)/(1, 1, 8)> (400, 600, 50)@(400, 600, 300)[(:,:,178:228)]
Processing block 3/8<(0, 0, 3)/(1, 1, 8)> (400, 600, 50)@(400, 600, 300)[(:,:,107:157)]
Processing block 2/8<(0, 0, 2)/(1, 1, 8)> (400, 600, 50)@(400, 600, 300)[(:,:,71:121)]
Processing block 6/8<(0, 0, 6)/(1, 1, 8)> (400, 600, 50)@(400, 600, 300)[(:,:,214:264)]
Processing block 7/8<(0, 0, 7)/(1, 1, 8)> (400, 600, 50)@(400, 600, 300)[(:,:,250:300)]
Processing block 1/8<(0, 0, 1)/(1, 1, 8)> (400, 600, 50)@(400, 600, 300)[(:,:,35:85)]: elapsed time: 0:00:08.295
Processing block 6/8<(0, 0, 6)/(1, 1, 8)> (400, 600, 50)@(400, 600, 300)[(:,:,214:264)]: elapsed time: 0:00:08.441
Processing block 0/8<(0, 0, 0)/(1, 1, 8)> (400, 600, 49)@(400, 600, 300)[(:,:,0:49)]: elapsed time: 0:00:08.719
Processing block 5/8<(0, 0, 5)/(1, 1, 8)> (400, 600, 50)@(400, 600, 300)[(:,:,178:228)]: elapsed time: 0:00:08.765
Processing block 2/8<(0, 0, 2)/(1, 1, 8)> (400, 600, 50)@(400, 600, 300)[(:,:,71:121)]: elapsed time: 0:00:08.772
Processing block 3/8<(0, 0, 3)/(1, 1, 8)> (400, 600, 50)@(400, 600, 300)[(:,:,107:157)]: elapsed time: 0:00:08.797
Processing block 7/8<(0, 0, 7)/(1, 1, 8)> (400, 600, 50)@(400, 600, 300)[(:,:,250:300)]: elapsed time: 0:00:08.800
Processing block 4/8<(0, 0, 4)/(1, 1, 8)> (400, 600, 49)@(400, 600, 300)[(:,:,143:192)]: elapsed time: 0:00:08.923
Processed 8 blocks with function 'smooth_by_configuration': elapsed time: 0:00:09.197
Binary smoothing: done: elapsed time: 0:00:09.199
Binary filling: initialized!
Binary filling: elapsed time: 0:00:01.428
Binary post processing: elapsed time: 0:00:10.715
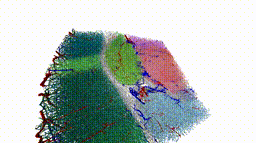
Graph construction
In this section the binary image is turned into a graph with 3d geometric information of the vasculatur network as well as marker expression levels and atal annotations.
Skeletonization
The first step will create a vessel center line and for a full data set.
Note
The skeletonizatoin algorithm is highly optimized. While the algorithm here should take about 1h for a hemisphere, standard algorithms can take over a week of processing.
[ ]:
binary = ws.filename('binary', postfix='filled');
skeleton = ws.filename('skeleton')
skl.skeletonize(binary, sink=skeleton, delete_border=True, verbose=True);
#############################################################
Skeletonization PK12 [convolution, index]
Foreground points: 7902209: elapsed time: 0:00:00.076
#############################################################
Iteration 1
<class 'numpy.ndarray'> int64 bool
uint8 int64 uint8 int64 int64 uint8
Border points: 2787009: elapsed time: 0:00:00.195
-------------------------------------------------------------
Sub-Iteration 0
Matched points : 549415: elapsed time: 0:00:00.613
Sub-Iteration 0: elapsed time: 0:00:00.633
-------------------------------------------------------------
Sub-Iteration 1
Matched points : 574686: elapsed time: 0:00:00.153
Sub-Iteration 1: elapsed time: 0:00:00.179
...
-------------------------------------------------------------
Sub-Iteration 9
Matched points : 0: elapsed time: 0:00:00.000
Sub-Iteration 9: elapsed time: 0:00:00.000
-------------------------------------------------------------
Sub-Iteration 10
Matched points : 0: elapsed time: 0:00:00.000
Sub-Iteration 10: elapsed time: 0:00:00.000
-------------------------------------------------------------
Sub-Iteration 11
Matched points : 0: elapsed time: 0:00:00.000
Sub-Iteration 11: elapsed time: 0:00:00.000
-------------------------------------------------------------
Non-removable points: 4
Foreground points : 7968
-------------------------------------------------------------
Iteration 27: elapsed time: 0:00:00.022
#############################################################
Skeletonization done: elapsed time: 0:00:07.966
Total removed: 7767404
Total remaining: 134805
Skeletonization: elapsed time: 0:00:08.049
[ ]:
binary = ws.filename('binary', postfix='filled');
skeleton = ws.filename('skeleton')
p3d.plot([[binary, skeleton]])
[<ClearMap.Visualization.Qt.DataViewer.DataViewer at 0x7f300404a4b0>]

Raw graph construction
The raw graph consists of nodes at each center pixel of the skeleton and edges between neighbouring pixels (26-connected).
[ ]:
graph_raw = gp.graph_from_skeleton(ws.filename('skeleton'), verbose=True)
#graph_raw.save(ws.filename('graph', postfix='raw'))
Graph from skeleton calculation initialize.!
Point list generation: elapsed time: 0:00:00.056
Graph initialized with 134805 vertices: elapsed time: 0:00:00.067
11928 edges with orientation 1/13 found: elapsed time: 0:00:00.001
9371 edges with orientation 2/13 found: elapsed time: 0:00:00.001
11104 edges with orientation 3/13 found: elapsed time: 0:00:00.000
9943 edges with orientation 4/13 found: elapsed time: 0:00:00.000
15953 edges with orientation 5/13 found: elapsed time: 0:00:00.008
14305 edges with orientation 6/13 found: elapsed time: 0:00:00.022
7887 edges with orientation 7/13 found: elapsed time: 0:00:00.016
13859 edges with orientation 8/13 found: elapsed time: 0:00:00.023
15441 edges with orientation 9/13 found: elapsed time: 0:00:00.023
9484 edges with orientation 10/13 found: elapsed time: 0:00:00.022
7666 edges with orientation 11/13 found: elapsed time: 0:00:00.019
8023 edges with orientation 12/13 found: elapsed time: 0:00:00.023
6902 edges with orientation 13/13 found: elapsed time: 0:00:00.010
Added 141866 edges to graph: elapsed time: 0:00:00.032
Skeleton to Graph: elapsed time: 0:00:00.358
[ ]:
p3d.plot_graph_line(graph_raw)
<GraphLine at 0x7f2ffcc63f10>

Measurements
Nex, measurements of expressoin levels of the markers and geometric properties are performed.
[ ]:
# Measure radii
coordinates = graph_raw.vertex_coordinates();
radii, indices = mr.measure_radius(ws.filename('binary', postfix='filled'), coordinates,
value=0, fraction=None, max_radius=150,
# value=None, fraction=0.8, max_radius=150,
return_indices=True, default=-1, verbose=True);
graph_raw.set_vertex_radii(radii)
Measuring radii of 134805 points in array of shape (400, 600, 300).
find_smaller_than_value: initialized!
find_smaller_than_value: elapsed time: 0:00:00.153
Measuring radii done: elapsed time: 0:00:10.356
[ ]:
# Artery binary measure
binary_arteries = ws.filename('binary', postfix='arteries_filled');
coordinates = graph_raw.vertex_coordinates();
radii = graph_raw.vertex_radii();
radii_measure = radii + 10;
expression = me.measure_expression(binary_arteries, coordinates, radii,
method='max', verbose=True);
graph_raw.define_vertex_property('artery_binary', expression);
Measuring expression of 134805 points in array of shape (400, 600, 300).
measure_max: initialized!
measure_max: elapsed time: 0:00:00.059
Measuring expression done: elapsed time: 0:00:00.068
[ ]:
# Artery raw measure
artery_raw = ws.filename('stitched', postfix='arteries');
coordinates = graph_raw.vertex_coordinates();
radii = graph_raw.vertex_radii();
radii_measure = radii + 10;
expression = me.measure_expression(artery_raw, coordinates, radii_measure,
method='max', verbose=True);
graph_raw.define_vertex_property('artery_raw', np.asarray(expression.array, dtype=float));
Measuring expression of 134805 points in array of shape (400, 600, 300).
measure_max: initialized!
measure_max: elapsed time: 0:00:02.393
Measuring expression done: elapsed time: 0:00:02.420
[ ]:
# Save raw graph
graph_raw.save(ws.filename('graph', postfix='raw'))
#graph_raw = grp.load(ws.filename('graph', postfix='raw'))
Graph postprocessing
In this step the raw graph is cleaned and simplified to a reduced graph, in which nodes and edges forming a single are reduced to a single edge between branching nodes. The full goemetric information of each branch and expressoin levels are stored in reduced graph.
[ ]:
# Graph cleaning
graph_cleaned = gp.clean_graph(graph_raw,
vertex_mappings = {'coordinates' : gp.mean_vertex_coordinates,
'radii' : np.max,
'artery_binary' : np.max,
'artery_raw' : np.max},
verbose=True)
Graph cleaning: found 10110 branch points among 134805 vertices: elapsed time: 0:00:00.002
Graph cleaning: detected 1895 cliques of branch points: elapsed time: 0:00:00.121
Graph cleaning: removed 1895 cliques of branch points from 134805 to 128565 nodes and 141866 to 129899 edges: elapsed time: 0:00:00.587
Graph cleaning: Removed 53 isolated nodes: elapsed time: 0:00:00.025
Graph cleaning: cleaned graph has 128512 nodes and 129899 edges: elapsed time: 0:00:00.737
[ ]:
# Save cleaned graph
graph_cleaned.save(ws.filename('graph', postfix='cleaned'))
#graph_cleaned = grp.load(ws.filename('graph', postfix='cleaned'));
[ ]:
# Graph reduction
def vote(expression):
return np.sum(expression) >= len(expression) / 1.5;
graph_reduced = gp.reduce_graph(graph_cleaned, edge_length=True,
edge_to_edge_mappings = {'length' : np.sum},
vertex_to_edge_mappings={'artery_binary' : vote,
'artery_raw' : np.max,
'radii' : np.max},
edge_geometry_vertex_properties=['coordinates', 'radii', 'artery_binary', 'artery_raw'],
edge_geometry_edge_properties=None,
return_maps=False, verbose=True)
Graph reduction: initialized.
Graph reduction: Found 5447 branching and 123065 non-branching nodes: elapsed time: 0:00:00.080
Graph reduction: Scanned 5447/5447 branching nodes, found 254 branches: elapsed time: 0:00:00.270
Graph reduction: Scanned 123065/123065 non-branching nodes found 6834 branches: elapsed time: 0:00:02.644
Graph reduction: Graph reduced from 128512 to 5447 nodes and 129899 to 6834 edges: elapsed time: 0:00:02.799
[ ]:
# Save reduced graph
graph_reduced.save(ws.filename('graph', postfix='reduced'))
#graph_reduced = grp.load(ws.filename('graph', postfix='reduced'));
Visualize graph annotations
[ ]:
artery_raw = graph_reduced.edge_property('artery_raw')
edge_colors = p3d.col.color_map('viridis')(artery_raw/artery_raw.max());
p3d.plot_graph_line(graph_reduced, edge_colors=edge_colors)
<GraphLine at 0x7f2f6a7b3110>
[ ]:
radii = np.array(graph_reduced.edge_property('radii'), dtype=int)
radii_colors = p3d.col.color_map('magma')(radii/radii.max());
p3d.plot_graph_line(graph_reduced, edge_colors = radii_colors)
<GraphLine at 0x7f2f6a6605d0>

You can navigate through the graph via the mouse holding the following keys
Mouse button |
Keys |
Navigation |
|---|---|---|
|
3d rotate around center |
|
|
|
roll rotation |
|
|
elevation rotation |
|
|
azimuth rotation |
|
zoom |
|
|
|
translate center |
|
|
field of view |
|
zoom |
Rendering graphs as with full mesh give more infomration about the geometry but also takes more processing time.
[ ]:
p3d.plot_graph_mesh(graph_reduced, edge_colors=radii_colors)
<GraphMesh at 0x7f2f8a9342d0>

For rendering the graph the meshes can also be simplified and smoothed:
[ ]:
import ClearMap.Analysis.Graphs.GraphRendering as gr
interpolation = gr.interpolate_edge_geometry(graph_reduced, smooth=5, order=2, points_per_pixel=0.5, verbose=True);
coordinates, faces, colors = gr.mesh_tube_from_coordinates_and_radii(*interpolation,
n_tube_points=8, edge_colors=radii_colors,
processes=None, verbose=True);
p = p3d.plot_mesh_3d(coordinates, faces, vertex_colors=colors);
Mesh interpolation 0 / 6834.
Mesh interpolation 1000 / 6834.
Mesh interpolation 2000 / 6834.
Mesh interpolation 3000 / 6834.
Mesh interpolation 4000 / 6834.
Mesh interpolation 6000 / 6834.
Mesh interpolation 5000 / 6834.
Mesh calculation 0 / 6834.
Mesh calculation 1000 / 6834.
Mesh calculation 3000 / 6834.
Mesh calculation 2000 / 6834.
Mesh calculation 5000 / 6834.
Mesh calculation 4000 / 6834.
Mesh calculation 6000 / 6834.

Graph atlas registration and annotation
The folloiwng transdforms the graphs coordinates accoridng to the atlas registration calciulated from the raw images earlier and annotated it with the atlas label as well as a distance to brain surface measure.
[ ]:
# Graph atlas registration
def transformation(coordinates):
coordinates = res.resample_points(
coordinates, sink=None, orientation=None,
source_shape=io.shape(ws.filename('binary', postfix='final')),
sink_shape=io.shape(ws.filename('resampled')));
coordinates = elx.transform_points(
coordinates, sink=None,
transform_directory=ws.filename('resampled_to_auto'),
binary=True, indices=False);
coordinates = elx.transform_points(
coordinates, sink=None,
transform_directory=ws.filename('auto_to_reference'),
binary=True, indices=False);
return coordinates;
graph_reduced.transform_properties(transformation=transformation,
vertex_properties = {'coordinates' : 'coordinates_atlas'},
edge_geometry_properties = {'coordinates' : 'coordinates_atlas'},
verbose=True);
def scaling(radii):
resample_factor = res.resample_factor(
source_shape=io.shape(ws.filename('binary', postfix='final')),
sink_shape=io.shape(ws.filename('resampled')))
return radii * np.mean(resample_factor);
graph_reduced.transform_properties(transformation=scaling,
vertex_properties = {'radii' : 'radii_atlas'},
edge_properties = {'radii' : 'radii_atlas'},
edge_geometry_properties = {'radii' : 'radii_atlas'})
[ ]:
# Graph atlas annotation
ano.set_annotation_file(annotation_file)
def annotation(coordinates):
label = ano.label_points(coordinates, key='order');
return label;
graph_reduced.annotate_properties(annotation,
vertex_properties = {'coordinates_atlas' : 'annotation'},
edge_geometry_properties = {'coordinates_atlas' : 'annotation'});
[ ]:
# Distance to surface
distance_atlas = io.as_source(distance_file)
distance_atlas_shape = distance_atlas.shape
def distance(coordinates):
c = np.asarray(np.round(coordinates), dtype=int);
c[c<0] = 0;
x = c[:,0]; y = c[:,1]; z = c[:,2];
x[x>=distance_atlas_shape[0]] = distance_atlas_shape[0]-1;
y[y>=distance_atlas_shape[1]] = distance_atlas_shape[1]-1;
z[z>=distance_atlas_shape[2]] = distance_atlas_shape[2]-1;
d = distance_atlas[x,y,z];
return d;
graph_reduced.transform_properties(distance,
vertex_properties = {'coordinates_atlas' : 'distance_to_surface'},
edge_geometry_properties = {'coordinates_atlas' : 'distance_to_surface'});
distance_to_surface = graph_reduced.edge_geometry('distance_to_surface', as_list=True);
distance_to_surface__edge = np.array([np.min(d) for d in distance_to_surface])
graph_reduced.define_edge_property('distance_to_surface', distance_to_surface__edge)
Finally we remove all the isolated components and keep the largest graph component only and save the graph.
[ ]:
# Graph largests component
graph = graph_reduced.largest_component()
[ ]:
# Save annotated graph
graph.save(ws.filename('graph', postfix='annotated'))
#graph = grp.load(ws.filename('graph', postfix='annotated'));
Artery & vein processing
In this section we label arteries and veins making use of the vessels radii as well as the ACTA2 expression.
Large vein detection
To detect the large veins, we use two criteria: a large radius and low expression of the Acta2 marker.
This is visible in the plot below, where each dot represents an annotated vessel, its Acta2 signal on the x-axis and its radius on the y-axis. Blacks are capillaries, blues veins and reds arteries. Large veins have a low Acta2 expression predominantly, while arteries high Acta2 expression.

We first look at a “safe” quadrant to identify large veins and pick a high radius and a low maximal Acta2 expression.
[ ]:
# veins: large radii and low acta2 expression
vein_large_radius = 8
vein_artery_expression_min = 0;
vein_artery_expression_max = 2500;
radii = graph.edge_property('radii');
artery_expression = graph.edge_property('artery_raw');
vessel_large = radii >= vein_large_radius;
vein_expression = np.logical_and(artery_expression >= vein_artery_expression_min,
artery_expression <= vein_artery_expression_max);
vein_large = np.logical_and(vessel_large, vein_expression)
Artery detection
Arteries have been defined previously as vessels that have Acta2 expression in the binary mask as a first approximation.
To correct for errors due to isolated vessel branches or large veins that express low levels of Acta2, we require a minimum number min_artery_size of branches an artery must have.
[ ]:
# arteries
min_artery_size = 3;
artery = graph.edge_property('artery_binary');
graph_artery = graph.sub_graph(edge_filter=artery, view=True);
graph_artery_edge, edge_map = graph_artery.edge_graph(return_edge_map=True)
artery_components, artery_size = graph_artery_edge.label_components(return_vertex_counts=True);
remove = edge_map[np.in1d(artery_components, np.where(artery_size < min_artery_size)[0])];
artery[remove] = False;
artery = np.logical_and(artery, np.logical_not(vein_large))
graph.define_edge_property('artery', artery)
To correct the lableing further, arteries are traced to smaller radii and expression levels.
Note
Vessels on the cortical surface often cross and thus might not fully get resolved as separate vessels. To avoid tracing in those cases, we stop the tracing when its approaching the surface.
The parameters are:
artery_trace_radiusis the radius (in pixel) at which the traicng is stoppedartery_expression_minis the minimum signal level at which tracing is stoppeddistance_thresholdis the minimum distance to the surface (in pixel) at whihc tracing is stopped (15 pixels in the Atlas coordinate system are about 375µm)max_artery_tracingis the maximum umber of branches to add to the tracing.
Tip
You can define your own conditions that will continue the tracing via changing the continue_edge function.
[ ]:
# artery tracing
#stop at surface, vein or low artery expression
artery_trace_radius = 5;
artery_expression_min = 500;
distance_threshold = 15;
max_artery_tracing = 5;
radii = graph.edge_property('radii');
artery = graph.edge_property('artery');
artery_expression = graph.edge_property('artery_raw');
distance_to_surface = graph.edge_property('distance_to_surface');
def continue_edge(graph, edge):
if distance_to_surface[edge] < distance_threshold or vein[edge]:
return False;
else:
return radii[edge] >= artery_trace_radius and artery_expression[edge] >= artery_expression_min;
artery_traced = gp.trace_edge_label(graph, artery, condition=continue_edge, max_iterations=max_artery_tracing);
# optional binary opening or closing
#artery_traced = graph.edge_close_binary(artery_traced, steps=1);
#artery_traced = graph.edge_open_binary(artery_traced, steps=1);
graph.define_edge_property('artery', artery_traced);
Vein detection
In this step we detect big unlabled vessels as veins and also trace those through the graph.
[ ]:
# veins - big
vein_big_radius = 6
radii = graph.edge_property('radii');
artery = graph.edge_property('artery');
big_vessel = radii >= vein_big_radius;
vein = np.logical_and(np.logical_or(vein_large,big_vessel), np.logical_not(artery))
graph.define_edge_property('vein_big', vein);
[ ]:
# veins - tracing
#trace veins by hysteresis thresholding - stop before arteries
vein_trace_radius = 5;
max_vein_tracing = 5;
min_distance_to_artery = 1;
radii = graph.edge_property('radii');
artery = graph.edge_property('artery');
vein_big = graph.edge_property('vein_big');
artery_expanded = graph.edge_dilate_binary(artery, steps=min_distance_to_artery);
def continue_edge(graph, edge):
if artery_expanded[edge]:
return False;
else:
return radii[edge] >= vein_trace_radius;
vein = gp.trace_edge_label(graph, vein_big, condition=continue_edge, max_iterations=max_vein_tracing);
#vein = graph.edge_close_binary(vein, steps=1);
#vein = graph.edge_open_binary(vein, steps=1);
graph.define_edge_property('vein', vein);
Artery and vein detection - filtering
In this final optional step we remove artery and vein components smaller than a certain size
[ ]:
# arteries - remove small components
min_artery_size = 30;
artery = graph.edge_property('artery');
graph_artery = graph.sub_graph(edge_filter=artery, view=True);
graph_artery_edge, edge_map = graph_artery.edge_graph(return_edge_map=True)
artery_components, artery_size = graph_artery_edge.label_components(return_vertex_counts=True);
remove = edge_map[np.in1d(artery_components, np.where(artery_size < min_artery_size)[0])];
artery[remove] = False;
graph.define_edge_property('artery', artery)
[ ]:
# veins - remove small vein components
min_vein_size = 30;
vein = graph.edge_property('vein');
graph_vein = graph.sub_graph(edge_filter=vein, view=True);
graph_vein_edge, edge_map = graph_vein.edge_graph(return_edge_map=True)
vein_components, vein_size = graph_vein_edge.label_components(return_vertex_counts=True);
remove = edge_map[np.in1d(vein_components, np.where(vein_size < min_vein_size)[0])];
vein[remove] = False;
graph.define_edge_property('vein', vein)
[ ]:
# save graph
graph.save(ws.filename('graph'))
Graph analysis
The final graph can now be analyzed and visualized for inspection.
Tip
To analyze or visualize the graph it can be useful to extract sub-graphs via the sub_graph function or slice the graph in space first via slice_graph.
You can use the annotation to extract sub-graphs in different brain regions.
[ ]:
# load graph
graph = grp.load(ws.filename('graph'))
[ ]:
ano.find('Isocortex', key='name')
Isocortex
=========
id : 315
atlas_id : 746
ontology_id : 1
acronym : Isocortex
name : Isocortex
color_hex_triplet : 70FF71
graph_order : 5
st_level : None
hemisphere_id : 3
parent_structure_id: 695
level : 6
order : 6
rgb : [0.43921569 1. 0.44313725]
color_order : 6
[ ]:
# sub-graph extraction
label = graph.vertex_annotation();
label_leveled = ano.convert_label(label, key='order', value='order', level=6)
vertex_filter = label_leveled == 6;
gs = graph.sub_graph(vertex_filter=vertex_filter);
Tip
You can include neighbouring vertices and edges around the extracted sub-region by expanding a vertex or edge filter several steps into the graph:
vertex_filter = graph.expand_vertex_filter(vertex_filter, steps=2)
You can also simply slice the graph manually, e.g in a sagittal plane
[ ]:
gs = graph.sub_slice((slice(1,300), slice(50,480), slice(165,175)), coordinates='coordinates_atlas')
or blocks around other areas
[ ]:
# sub-slice into brain regions
# Cerebellum
gs = graph.sub_slice((slice(1,270), slice(1,220), slice(210,220)),
coordinates='coordinates_atlas');
# Hippocampus sagittal
gs = graph.sub_slice((slice(1,300), slice(50,480), slice(165,185)),
coordinates='coordinates_atlas');
gs = graph.sub_slice((slice(18,180), slice(150,280), slice(153,180)),
coordinates='coordinates_atlas’);
# Striatum coronal
gs = graph.sub_slice((slice(1,270), slice(100,108), slice(1,240)),
coordinates='coordinates_atlas');
# Auditory coronal
gs = graph.sub_slice((slice(1,270), slice(200,210), slice(1,240)),
coordinates='coordinates_atlas');
# Cortex saggittal hippocampus
gs = graph.sub_slice((slice(1,300), slice(270,280), slice(1,240)),
coordinates='coordinates_atlas');
# Midline
gs = graph.sub_slice((slice(500,1500), slice(3000,4000), slice(2910,2960)));
Graph visualization
Here are some examples how to visualize various aspects of the graph.
[ ]:
# line graph - ABA colors
vertex_colors = ano.convert_label(gs.vertex_annotation(), key='order', value='rgba');
p = p3d.plot_graph_line(gs, color=vertex_colors)
[ ]:
#%% mesh graph - ABA colors
vertex_colors = ano.convert_label(gs.vertex_annotation(), key='order', value='rgba');
p = p3d.plot_graph_mesh(gs, default_radius=0.15, vertex_colors=vertex_colors, n_tube_points=5)
[ ]:
edge_vein_label = gs.edge_property('vein');
edge_artery_label = gs.edge_property('artery');
vertex_colors = ano.convert_label(gs.vertex_annotation(), key='order', value='rgba');
connectivity = gs.edge_connectivity();
edge_colors = (vertex_colors[connectivity[:,0]] + vertex_colors[connectivity[:,1]])/2.0;
edge_colors[edge_artery_label >0] = [0.8,0.0,0.0,1.0]
edge_colors[edge_vein_label >0] = [0.0,0.0,0.8,1.0]
p = p3d.plot_graph_mesh(gs, edge_colors=edge_colors, n_tube_points=3);

[ ]:
# veins and arteries only
edge_vein_label = gs.edge_property('vein');
edge_artery_label = gs.edge_property('artery')
edge_filter=np.logical_or(edge_vein_label,edge_artery_label)
gsrt = gs.sub_graph(edge_filter=edge_filter)
edge_vein_label = gsrt.edge_property('vein');
edge_artery_label = gsrt.edge_property('artery')
edge_colors = np.zeros((grst.n_edges, 4));
edge_colors[edge_artery_label] = [0.8,0.0,0.0,1.0];
edge_colors[edge_vein_label ] = [0.0,0.0,0.8,1.0];
p = p3d.plot_graph_mesh(gsrt, edge_colors=edge_colors, n_tube_points=5);

Vessel orientation
[ ]:
# vessel orientation
vetex_coordinates = gs.vertex_coordinates()
connectivity = gs.edge_connectivity();
orientations = vetex_coordinates[connectivity[:,0]] - vetex_coordinates[connectivity[:,1]];
orientations = (orientations.T / np.linalg.norm(orientations, axis=1)).T
#edge_colors = col.orientation_to_rgb(orientations, alpha=1.0);
edge_colors = col.orientation_to_boys(orientations, alpha=1.0);
edge_artery_label = gs.edge_property('artery');
edge_colors[edge_artery_label>0] = [0.8,0.0,0.0,1.0]
p = p3d.plot_graph_mesh(gs, edge_colors=edge_colors, n_tube_points=3);
Branch density
A simple way to calculate densites of graph properties is via the voxelization tools:
[ ]:
voxelize_branch_parameter = {
"method" : 'sphere',
"radius" : (15,15,15),
"weights" : None,
"shape" : io.shape(reference_file),
"verbose" : True
};
vertices = graph.vertex_coordinates();
branch_density = vox.voxelize(vertices, sink=ws.filename('density', postfix='branches'),
dtype='float32', **voxelize_branch_parameter)
Statistics
Densities or intensity measures of each sample in considered regions or annotated brain areas between different groups of samples can be compared using the independent two sample student t-test assuming unequal variances.
ClearMap as a discovery tool also provides correction for p-values for multiple comparison to q-values to control for false-discovery rate.
See the :mod:ClearMap.Analysis.Statistics module for more details.